
Safety Precautions and Warnings
Always follow safety guidelines during pool table assembly. Ensure the area is clear and well-lit. Wear protective gear like gloves and safety glasses. Keep children away. Avoid overloading the table. Never assemble alone; two adults are recommended. Use proper lifting techniques to prevent injury. Ensure all tools are in good condition. Follow the manufacturer’s instructions carefully to avoid accidents.
- Adult supervision is mandatory during assembly.
- Avoid using damaged or worn-out tools.
- Keep all small parts away from children.
1.1 General Safety Guidelines
Always read and understand the assembly instructions fully before starting. Ensure the assembly area is clean‚ well-lit‚ and free from obstacles. Adult supervision is mandatory‚ and children should be kept away. Wear protective gear such as gloves and safety glasses to prevent injuries. Use proper lifting techniques to avoid strain or accidents. Never assemble the pool table alone; at least two adults are required. Ensure all tools and materials are in good condition before use. Follow the manufacturer’s guidelines strictly to ensure safety and proper assembly. Avoid overloading the table or using damaged components. Keep loose clothing and long hair tied back to prevent entanglement with tools or parts. If unsure about any step‚ consider consulting a professional.
- Ensure a stable and even surface for assembly.
- Avoid using power tools near children.
- Keep all small parts out of reach of children.

1.2 Specific Warnings for Pool Table Assembly
Exercise extreme caution when handling heavy components‚ such as the slate and table frame‚ to prevent injury. Always use proper lifting techniques and ensure at least two adults are present for lifting. Avoid using damaged or worn-out tools‚ as they may cause accidents or improper assembly. Keep all small parts‚ such as screws and bolts‚ out of children’s reach to avoid choking hazards. Never attempt to modify the table or use unauthorized parts‚ as this may compromise its stability and safety. Be cautious when handling sharp edges‚ such as those on slate or metal components‚ and wear protective gloves. Prevent exposure to chemicals or adhesives by working in a well-ventilated area. If unsure about any step‚ consider consulting a professional to ensure safety and proper assembly.
- Use protective gear when handling sharp or heavy components.
- Avoid using power tools near children or pets.
- Ensure all parts are undamaged before assembly.
Tools and Materials Required
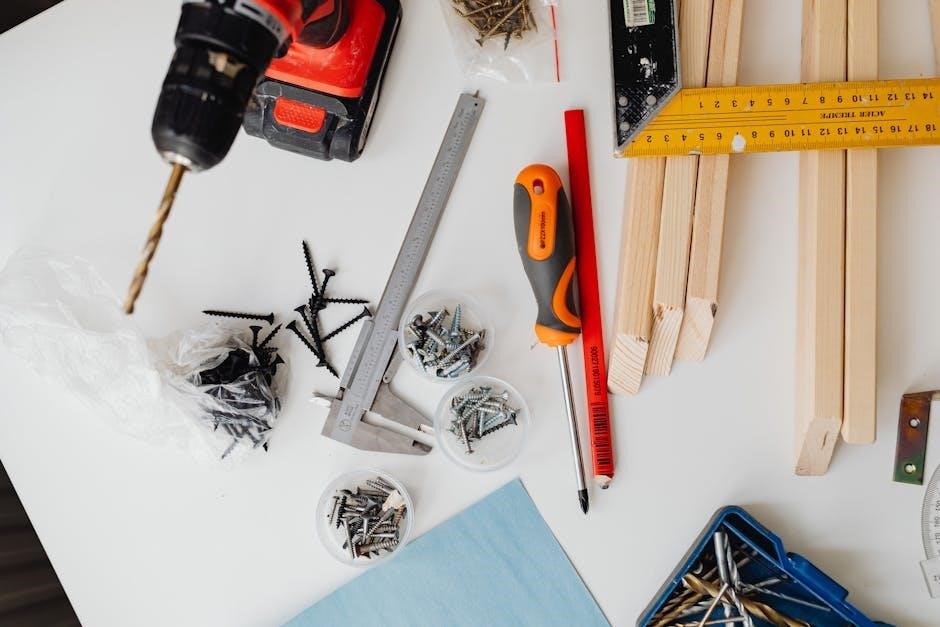
Essential tools include a screwdriver‚ wrench‚ and Allen key. Materials needed are felt cloth‚ slate pieces‚ and bolts for secure assembly. Use protective gloves and ensure all items are undamaged for safe installation.
- Tools: Screwdriver‚ wrench‚ Allen key‚ and pliers.
- Materials: Felt cloth‚ slate‚ bolts‚ and wood screws.
2.1 List of Essential Tools
Ensure you have the following tools for a smooth assembly process:
- Screwdriver: Flathead and Phillips for securing screws.
- Wrench: Adjustable or socket wrench for tightening bolts.
- Allen Key: For assembling and adjusting table legs.
- Pliers: Needle-nose pliers for reaching small spaces.
- Hammer: For tapping parts into place gently.
- Tape Measure: To ensure accurate measurements.
- Clamps: To hold parts steady during assembly.
- Utility Knife: For cutting packaging or excess material.
- Level: To ensure the table is perfectly level.
- Socket Set: For various bolt sizes and adjustments.
Using high-quality tools will ensure a secure and precise assembly. Keep all tools organized and within reach to avoid delays.
2.2 Materials Needed for Assembly
Ensure all components are included in your pool table kit:
- Table Frame: Pre-drilled for easy assembly.
- Slate: Precision-cut for a smooth playing surface.
- Felt: Pre-fitted to the slate for easy installation.
- Cushion Rails: Includes rubber cushions and bolts.
- Pockets: Six pockets with nets and screws.
- Legs: Adjustable legs with levelers.
- Hardware: Bolts‚ screws‚ and nuts for securing parts.
- Accessories: Ball‚ cue sticks‚ chalk‚ and a triangle.
Organize all parts before starting. Verify the inventory matches the manual to avoid delays. Keep packaging materials handy for protection during assembly.
Site Preparation and Unpacking
Choose a spacious‚ level area for assembly. Clear the room of breakables and ensure the floor is protected. Unpack components carefully‚ checking for damage. Use cardboard or carpet to prevent scratches. Organize parts and hardware in labeled groups for easy access during assembly. Verify all items are included before starting.
Protective materials: Carpet or cardboard for the floor.
Tools needed: Screwdrivers‚ wrenches‚ and a rubber mallet.
Additional supplies: Measuring tape and clamps for stability.
3.1 Preparing the Assembly Area
Choose a spacious‚ dry‚ and level area for assembly. Ensure the floor is protected with cardboard or carpet to prevent scratches. Clear the room of breakables and obstacles. Unpack all components near the assembly site. Organize tools and hardware in a accessible location. Verify the area is well-lit and ventilated. Avoid assembling in direct sunlight or humid conditions. Use clamps or weights to stabilize large parts during preparation. Double-check that all parts are included and undamaged before proceeding. Labeling components can help streamline the assembly process. Ensure the area remains clean and free from debris to avoid accidents and ensure proper fitment of parts.
- Protect the floor with cardboard or carpet.
- Ensure the area is well-lit and ventilated.
- Organize tools and components for easy access.
3.2 Unpacking and Organizing Components
Begin by carefully unpacking all components from the boxes. Inspect each part for damage and ensure all items are included. Organize the components by category‚ such as legs‚ frame sections‚ slate‚ and accessories. Use a soft surface like cardboard or carpet to protect delicate parts during unpacking. Label each component based on the assembly manual for easy identification. Keep small hardware like screws and bolts in separate‚ labeled containers to avoid misplacement. Double-check the inventory list to confirm all parts are present before starting assembly. This systematic approach will streamline the assembly process and reduce the risk of errors.
- Unpack components on a soft‚ protective surface.
- Label and categorize parts for easy access.
- Store small hardware in labeled containers.
- Verify the completeness of all parts before proceeding.
Step-by-Step Assembly Instructions
Begin by assembling the table frame‚ then attach the legs and levelers. Secure the slate surface tightly and install the felt cloth. Follow the manual for precise alignment and tightening. Ensure all bolts are properly fastened and the table is level before finalizing. Use a spirit level to verify accuracy. Double-check all connections for stability and safety.
- Assemble the frame first‚ ensuring it is square.
- Attach legs and levelers for stability.
- Secure the slate and smooth out the felt.
4.1 Assembling the Table Frame
Start by laying out the table frame components on a flat surface. Attach the side rails to the table ends using the provided bolts and washers. Tighten them securely but avoid over-tightening. Next‚ connect the cross beams to the side rails for added stability. Ensure all joints are aligned properly and the frame is square. Use a spirit level to verify the frame’s balance. If necessary‚ adjust the legs to achieve evenness. Once the frame is assembled‚ double-check all connections for tightness and stability. Proper alignment is crucial for the table’s performance; Follow the manufacturer’s instructions for specific bolt torque values.
- Align the frame components accurately.
- Tighten bolts evenly to maintain stability;
- Use a spirit level to ensure the frame is square.
4.2 Securing the Slate and Felt
Place the slate surface onto the assembled table frame‚ ensuring it is centered and evenly aligned. Use a protective covering like cardboard to prevent scratches. Secure the slate with screws‚ tightening them gradually in a crisscross pattern to avoid warping. Once the slate is firmly attached‚ lay the felt over the surface‚ starting from the center and smoothing outward to eliminate wrinkles. Use a staple gun to secure the felt tightly around the edges and cushion noses. Ensure the felt is evenly stretched and free of bubbles for proper playability. Finally‚ trim any excess felt material around the pockets and edges for a clean finish.
- Ensure the slate is centered and evenly aligned.
- Secure the felt tightly to avoid wrinkles.
- Trim excess felt for a professional finish.

Final Adjustments and Testing
After assembly‚ test the table by rolling a ball to ensure it’s level. Check the felt smoothness and pocket tightness for optimal gameplay experience.

- Ensure the table is perfectly level.
- Verify the felt is smooth and evenly stretched.
- Test the pockets for proper ball return functionality.
5.1 Leveling the Pool Table
To ensure proper gameplay‚ leveling the pool table is crucial. Begin by placing a spirit level on the playing surface to check for evenness. Adjust the leg levelers until the table is perfectly balanced. Use a ball to test the roll; it should move smoothly in all directions without drifting. Repeat the process for all four corners‚ ensuring consistency. Tighten all legs securely after adjustments. For precise alignment‚ use shims if necessary to stabilize uneven floors. Double-check the level after tightening to confirm accuracy. A properly leveled table guarantees optimal performance and prevents balls from rolling unevenly during play. Ensure all adjustments are made carefully to avoid damaging the slate or frame.
- Use a high-quality spirit level for accuracy.
- Test with a ball to confirm evenness.
- Secure all adjustments firmly to prevent shifting.
5.2 Testing the Table for Proper Functionality
After assembly‚ thoroughly test the pool table to ensure all components function correctly. Roll a ball across the surface to verify even movement and proper leveling. Check the cushions for consistent rebound and responsiveness. Inspect the pockets to ensure balls fall smoothly and do not get stuck. Test the felt for evenness and secure attachment to the slate. Verify that all bolts and screws are tightened properly; Play a few practice shots to assess overall performance. Address any issues immediately to prevent damage or poor gameplay. A well-tested table ensures enjoyable and precise play‚ making the assembly process worthwhile. Regular testing after assembly helps maintain the table’s condition and performance over time.
- Roll a ball to check surface evenness.
- Test cushion responsiveness and pocket functionality.
- Ensure all components are securely fastened.