Brother JX2517 Sewing Machine Manual: A Comprehensive Guide
This 80-page manual details the Brother JX2517‚ covering setup‚ operation‚ troubleshooting‚ and connectivity—including iPrint&Scan and wireless network options.
The Brother JX2517 sewing machine is a versatile tool designed for both beginners and experienced sewers. This manual serves as a comprehensive resource‚ guiding users through every aspect of the machine’s functionality. It details initial setup‚ from unboxing to powering on‚ and explains each component’s purpose.
Whether you’re tackling simple repairs or complex projects‚ understanding your JX2517 is key. This guide provides clear instructions on stitch selection‚ adjustment of length and width‚ and mastering thread tension. Furthermore‚ it covers advanced techniques‚ troubleshooting common issues‚ and essential maintenance procedures to ensure longevity. The manual also explores connectivity options like Brother iPrint&Scan and wireless networking.
Overview of the 80-Page Manual
This 80-page manual is structured to provide a complete understanding of the Brother JX2517 sewing machine. It begins with getting started – unboxing‚ setup‚ and component identification. Subsequent sections delve into key features like stitch selection‚ adjustments‚ and tension control.
A significant portion is dedicated to threading‚ bobbin winding‚ and insertion. Advanced techniques‚ including presser feet usage and fabric type guidance‚ are thoroughly explained. Maintenance‚ covering cleaning‚ lubrication‚ and needle replacement‚ ensures optimal performance. Finally‚ the manual details connectivity‚ including iPrint&Scan and wireless network setup‚ alongside driver installation and OS compatibility information.
Getting Started with Your JX2517
Begin with unboxing‚ identifying machine components‚ and initial setup as outlined in the manual‚ ensuring proper power connection and basic operation.
Unboxing and Initial Setup
Carefully unpack your Brother JX2517 sewing machine‚ verifying all components are present according to the included parts list within the 80-page manual. Remove all packaging materials and protective coverings.
Before initial use‚ ensure the machine is placed on a stable‚ level surface. Connect the power cord securely‚ but do not switch the machine on yet. Familiarize yourself with the basic layout‚ noting the key areas like the bobbin winder‚ thread tension dial‚ and stitch selection panel.
The manual provides detailed diagrams to aid in identifying each part; Proper initial setup is crucial for optimal performance and longevity of your new sewing machine.
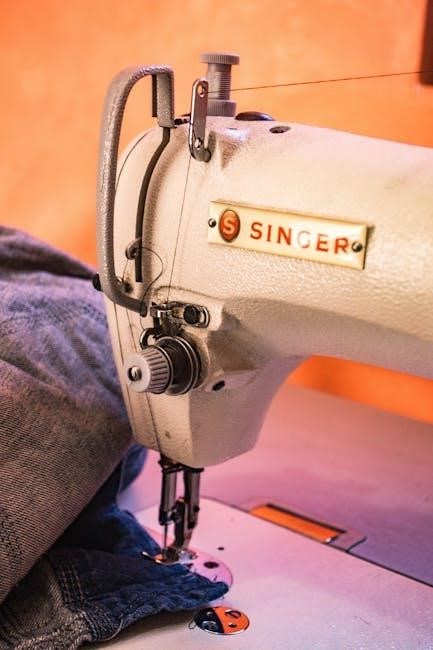
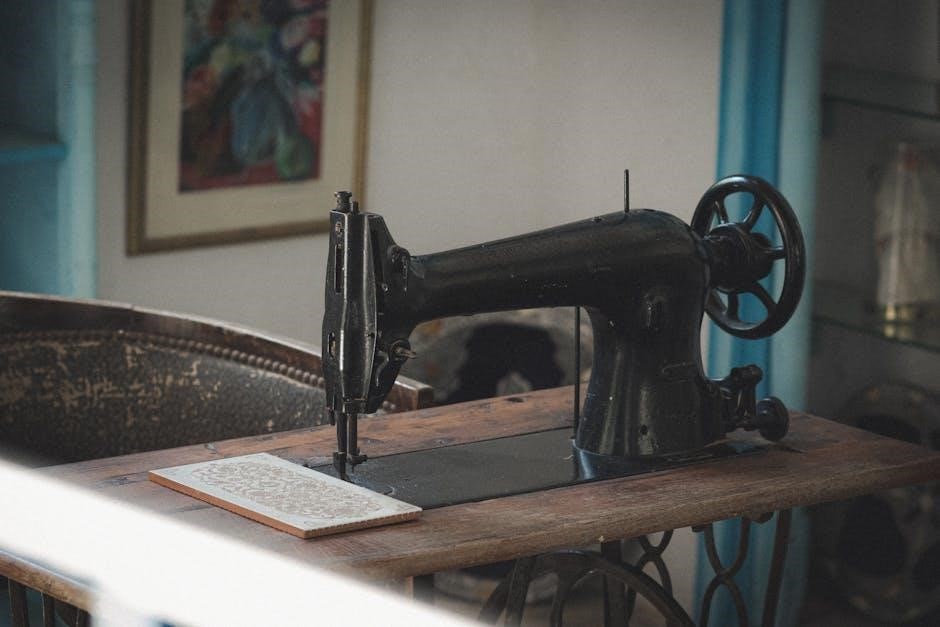
Machine Components Identification
The Brother JX2517 boasts several key components‚ meticulously detailed within the 80-page instruction manual. These include the power switch‚ handwheel‚ stitch length dial‚ stitch width dial‚ and the reverse lever.
Locate the bobbin winder assembly‚ upper thread tension dial‚ and presser foot lever. Understand the function of the needle clamp and needle plate. The manual’s diagrams clearly illustrate the placement of each part.
Familiarizing yourself with these components is essential for successful threading‚ bobbin winding‚ and overall machine operation. Correct identification prevents errors and ensures smooth sewing experiences.
Powering On and Basic Operation
To begin‚ ensure the power cord is securely connected. The Brother JX2517 is activated using the clearly marked power switch. Once on‚ select your desired stitch using the stitch selection dial‚ referencing the comprehensive stitch guide within the manual.
Adjust stitch length and width using their respective dials‚ experimenting to achieve the desired result for your fabric. Gently depress the foot pedal to initiate sewing‚ maintaining a consistent speed.
The reverse lever allows for backstitching‚ securing seams. Practice these basic operations to build confidence and familiarize yourself with the machine’s responsiveness.
Understanding Key Features
Explore stitch selection‚ adjustable length/width‚ and thread tension control—essential for versatile sewing. The manual provides detailed guidance for optimal results.
Stitch Selection Guide
The Brother JX2517 boasts a variety of built-in stitches‚ catering to diverse sewing projects. This section of the manual meticulously details each stitch‚ illustrating its appearance and recommended applications.
Users will find clear diagrams and explanations for straight stitches‚ zigzag stitches‚ and potentially decorative options. The guide clarifies which stitches are best suited for different fabric weights and project types – from garment construction to quilting and crafting.
Understanding the stitch selection dial and corresponding stitch numbers is crucial. The manual emphasizes proper stitch selection to achieve professional-looking results and prevent fabric damage. It also provides tips for experimenting with stitch combinations to create unique effects.
Adjusting Stitch Length and Width
The Brother JX2517 manual provides detailed instructions on precisely controlling stitch length and width‚ essential for achieving desired sewing outcomes. Dedicated dials or buttons allow for easy adjustments‚ influencing the stitch’s density and overall appearance.
The guide explains how shorter stitch lengths are ideal for delicate fabrics and intricate details‚ while longer lengths are suitable for basting or heavier materials. Similarly‚ adjusting stitch width impacts the zigzag’s breadth or decorative stitch patterns.
The manual stresses the importance of testing adjustments on scrap fabric before starting a project. This ensures optimal settings for the chosen fabric and stitch‚ preventing puckering or breakage.
Thread Tension Control
The Brother JX2517 manual emphasizes the critical role of proper thread tension for creating balanced and professional-looking stitches. Incorrect tension leads to looping‚ puckering‚ or thread breakage‚ impacting the final project’s quality.
The manual details how to adjust the tension dial‚ explaining that higher numbers increase upper thread tension‚ while lower numbers decrease it. It advises users to test tension on scrap fabric‚ observing the stitch formation on both sides.
A balanced stitch will have even thread interlocking‚ while imbalances require tension adjustments. The guide provides visual examples to help identify and correct tension issues effectively.

Threading and Bobbin Winding
The JX2517 manual provides clear diagrams for upper threading‚ bobbin winding‚ and insertion‚ ensuring correct setup for smooth and reliable sewing performance.
Threading the Upper Thread
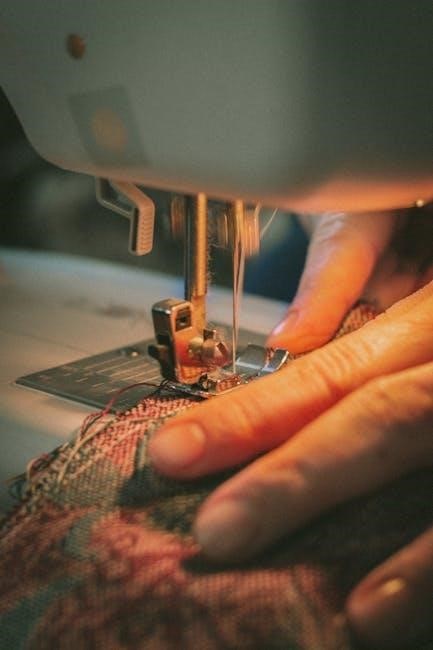
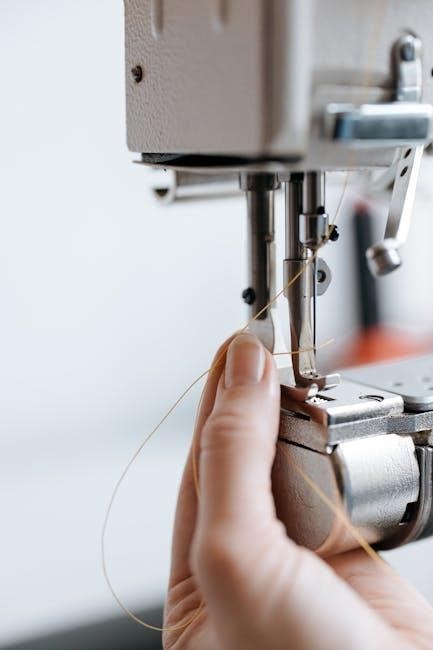
Successfully threading the upper thread on your Brother JX2517 is crucial for proper stitch formation. The manual meticulously guides you through each step‚ beginning with raising the presser foot and thread tension.
It details how to follow the numbered threading path indicated on the machine‚ ensuring the thread correctly passes through each guide‚ tension disc‚ and finally‚ the needle.
Pay close attention to the diagrams; incorrect threading can lead to skipped stitches or tension issues. The manual emphasizes verifying the thread is securely seated in the needle clamp before beginning to sew.
Winding the Bobbin
The Brother JX2517 manual provides clear instructions for winding the bobbin‚ a fundamental skill for sewing. Begin by placing the thread spool on the spool pin and securing it. Then‚ follow the threading path to guide the thread to the bobbin winder tension disc.
The manual illustrates how to correctly attach the empty bobbin to the bobbin winder spindle and engage the winder mechanism.
It’s vital to press the foot pedal gently to start winding‚ allowing the bobbin to fill evenly. The manual details how to stop the winder once full and trim the thread.
Inserting the Bobbin
The Brother JX2517 manual guides users through inserting the wound bobbin correctly. First‚ locate the bobbin case on the machine – the manual provides a clear diagram. Open the bobbin cover and carefully insert the bobbin into the bobbin case‚ ensuring it rotates freely.
The manual emphasizes the importance of threading the thread through the tension spring of the bobbin case‚ following the indicated path.
Finally‚ guide the thread through the take-up lever before closing the bobbin cover. Proper insertion ensures smooth and even stitching.

Advanced Sewing Techniques
Explore diverse presser feet‚ fabric compatibility‚ and solutions for common stitching problems‚ all detailed within the Brother JX2517’s comprehensive instruction manual.
Using Different Presser Feet
The Brother JX2517 manual extensively covers utilizing various presser feet to expand your sewing capabilities. Different feet are designed for specialized tasks‚ significantly impacting stitch quality and ease of use. For example‚ a zipper foot facilitates close-to-zipper stitching‚ while a buttonhole foot automates precise buttonhole creation.
The manual details how to correctly attach and detach each foot‚ ensuring secure operation. It also explains the optimal foot selection for different fabrics and projects – from delicate silks to heavy denim. Understanding these nuances allows for greater control and professional-looking results. Proper foot selection prevents fabric damage and ensures consistent stitch formation‚ unlocking the full potential of your JX2517.
Sewing Various Fabric Types
The Brother JX2517 manual provides detailed guidance on sewing a wide array of fabrics‚ recognizing each material demands specific settings. Adjustments to stitch length‚ width‚ and thread tension are crucial for optimal results. Delicate fabrics like chiffon require lighter tension and finer needles‚ preventing puckering or damage.
Conversely‚ heavier materials like denim necessitate increased tension and a robust needle. The manual illustrates recommended settings for common fabrics‚ alongside troubleshooting tips for issues like skipped stitches or thread breakage. Mastering these adjustments ensures consistent‚ professional-quality seams across all your projects‚ maximizing the JX2517’s versatility.
Troubleshooting Common Stitching Issues
The Brother JX2517 manual dedicates significant attention to resolving frequent stitching problems. Skipped stitches are often caused by incorrect needle insertion‚ a dull needle‚ or improper threading—the manual provides clear diagrams for correction. Thread breakage frequently stems from excessive tension or incorrect thread type; adjustments are detailed.
Puckered fabric usually indicates mismatched thread tension or an unsuitable needle. The manual’s troubleshooting section systematically guides users through diagnosing and fixing these issues‚ offering visual aids and step-by-step instructions. Consistent reference to this section minimizes frustration and ensures smooth project completion.

Maintenance and Care
The manual stresses regular cleaning‚ lubrication‚ and needle replacement for optimal performance of the JX2517‚ extending its lifespan and ensuring consistent stitch quality.
Cleaning the Machine
Regular cleaning is crucial for maintaining the Brother JX2517’s performance and longevity. The manual emphasizes removing lint‚ dust‚ and thread debris from various areas.
Specifically‚ users should clean the bobbin area‚ feed dogs‚ and around the needle plate frequently. A small brush‚ often included with the machine‚ is recommended for these delicate areas.
Power off and unplug the machine before cleaning. Avoid using liquid cleaners directly on the machine; instead‚ dampen a soft cloth and gently wipe surfaces.
Pay attention to the tension discs‚ ensuring they are free of lint buildup‚ as this can affect stitch quality. Consistent cleaning prevents malfunctions and ensures smooth operation.
Lubrication Guide
The Brother JX2517 manual details specific lubrication points to ensure smooth operation and prevent wear. It’s vital to use only recommended sewing machine oil; other lubricants can damage internal components.
Key areas requiring oiling include the bobbin race‚ hook assembly‚ and any moving parts identified in the manual’s diagrams. Apply oil sparingly‚ using a needle oiler for precision.
Avoid over-oiling‚ as excess oil can attract lint and create a sticky residue. The manual likely specifies the frequency of lubrication‚ typically after several hours of use or as needed.
Regular‚ careful lubrication extends the machine’s lifespan and maintains consistent stitch quality. Always power off and unplug the machine before performing any maintenance.
Replacing the Needle
The Brother JX2517 manual provides clear instructions for safely replacing the needle‚ a crucial maintenance task. Always power off and unplug the machine before beginning.
Loosen the needle clamp screw and remove the old needle‚ noting its orientation. Select the correct needle type and size for your fabric – the manual offers guidance.

Insert the new needle with the flat side facing the back‚ ensuring it’s fully inserted into the needle clamp. Tighten the screw securely‚ but avoid over-tightening.
A dull or bent needle can cause skipped stitches and fabric damage. Regular needle replacement‚ as outlined in the manual‚ ensures optimal sewing performance and prevents issues.

Connectivity and Software
The JX2517 offers Brother iPrint&Scan compatibility‚ alongside infrastructure and ad-hoc wireless network connection options‚ detailed within the manual.
Brother iPrint&Scan Compatibility
Brother iPrint&Scan significantly enhances the JX2517’s functionality by enabling seamless scanning and workflow management directly from your PC or Mac. This software provides convenient access to your machine’s scanning capabilities‚ allowing you to digitize documents and images with ease. The manual provides clear‚ step-by-step instructions on how to download and install the Brother iPrint&Scan application for both Windows and Macintosh operating systems.
Users can leverage iPrint&Scan for various tasks‚ including document scanning‚ image capture‚ and customized workflow settings. The software streamlines the scanning process‚ offering features like automatic document feeder support and optical character recognition (OCR) for converting scanned images into editable text. Detailed guidance within the manual ensures a smooth installation and optimal performance of iPrint&Scan with your JX2517 sewing machine.
Wireless Network Connection (Infrastructure)
Connecting your Brother JX2517 to an infrastructure wireless network unlocks convenient features like wireless printing and scanning‚ enhancing your creative workflow. The manual provides comprehensive instructions for joining your machine to a standard wireless network‚ often utilizing a wireless router. This process typically involves accessing the machine’s network settings through its control panel and selecting your network’s SSID (network name).
You’ll then be prompted to enter your network security key (password) to establish a secure connection. The manual details troubleshooting steps for common connection issues‚ such as incorrect password entry or signal strength problems. Successfully connecting via infrastructure mode allows for seamless integration with other wireless devices on your network‚ maximizing the JX2517’s versatility.
Wireless Network Connection (Ad-hoc)
The Brother JX2517 also supports ad-hoc wireless connections‚ enabling direct communication with a computer without a traditional wireless router. This method creates a peer-to-peer network between your machine and a single device‚ ideal for situations where a router isn’t available. The manual guides you through setting up an ad-hoc network directly from the JX2517’s control panel‚ defining a network name (SSID) and security key.
Detailed steps ensure a secure and reliable connection. However‚ ad-hoc mode typically supports only one connected device at a time. The manual clarifies the limitations of this connection type and provides troubleshooting advice for common issues‚ such as signal interference or compatibility problems. It’s a useful alternative when a standard infrastructure network isn’t feasible.
Driver Installation and Updates
Access drivers via Brother Support; installation is automated‚ but avoid cancellation during the process. Compatibility spans various operating systems‚ ensuring seamless functionality.
Downloading Drivers from Brother Support
To obtain the latest drivers for your Brother JX2517 sewing machine‚ navigate to the official Brother Support website. Begin by selecting your machine’s product category and then pinpointing the exact JX2517 model.
Subsequently‚ choose your specific operating system (OS) – Windows‚ macOS‚ or others – from the available options. Clicking “OK” will initiate the driver download process‚ presenting you with the most current versions tailored for your system.
Brother prioritizes providing up-to-date drivers to ensure optimal performance and compatibility. Regularly checking for updates guarantees a smooth and efficient sewing experience‚ resolving potential issues and unlocking new features. The website offers a streamlined process for easy access.
Full Driver and Software Package Installation
Once downloaded‚ initiating the full driver and software package installation for your Brother JX2517 is straightforward. Launch the downloaded file and allow the installation wizard to guide you through the process.
It’s crucial not to cancel any screens appearing during installation‚ as each step is vital for complete functionality. The process may require a few moments to complete‚ so please be patient.
The installation automatically progresses through a series of screens. Brother strongly recommends using only genuine Brother supplies for optimal performance. This package ensures seamless integration with your computer‚ unlocking all available features and capabilities of your JX2517.
Operating System Compatibility
Ensuring compatibility between your Brother JX2517 and your computer’s operating system is essential for smooth operation. When downloading drivers from the Brother support website‚ carefully select your specific OS version.
The website prioritizes displaying the most recent operating system versions‚ simplifying the selection process. However‚ older systems may also be supported – check the compatibility list provided on the download page.
Proper OS selection guarantees the downloaded drivers function correctly‚ preventing potential conflicts or malfunctions. Brother strives to provide broad compatibility‚ but verifying your system is key for a hassle-free experience.