Understanding Your Timex Watch Components
Your Timex watch features a combination of buttons, a crown, and either an analog or digital display. The crown is used for setting time and date, while buttons control additional functions like the INDIGLO night-light, chronograph, and alarm. Understanding these components is essential for optimal operation and care of your timepiece.
1.1 Identifying Buttons and Crown
Your Timex watch features a crown and buttons with specific functions. The crown is used to set the time and date, while buttons control features like the chronograph, alarm, and INDIGLO night-light. Buttons labeled A, B, and C are typically found on the right side, each serving unique purposes. The crown may have multiple positions, such as pulling out to set the time or date. Refer to your watch’s diagram for precise button locations and roles.
1.2 Understanding Analog vs. Digital Displays
Timex watches offer both analog and digital displays. Analog watches feature hour and minute hands, with optional seconds, providing a classic time-telling experience. Digital displays show time in numeric format, often with additional features like date, alarm, and chronograph. Some models combine both, offering versatility. Understanding your display type helps you navigate features and settings specific to your watch, ensuring optimal functionality and user experience.
Setting the Time, Date, and Day
Setting the time, date, and day on your Timex watch is straightforward. Use the crown for analog models and buttons for digital watches to ensure accurate timekeeping.
2.1 Setting the Time on a Digital Timex Watch
Setting the time on your digital Timex watch is simple. Press the SET button to enter time-setting mode. Use the MODE button to cycle through hours, minutes, and seconds. Adjust the values using the START/SPLIT button; Once set, press SET again to save. Ensure the time is accurate for proper functionality of other features like alarms and timers.
2.2 Setting the Time on an Analog Timex Watch
Pull the crown to the first position to set the date. Move it to the second position to set the time. Turn the crown clockwise or counterclockwise to adjust the hour and minute hands. Press the button at the 2 o’clock position to reset the seconds hand to zero. Push the crown back in to secure the time. Ensure accuracy for proper watch functionality.
2.3 Adjusting the Date and Day
To adjust the date and day on your analog Timex watch, pull the crown to the first position and turn it to set the date. Move the crown to the second position to adjust the day. Turn the crown clockwise or counterclockwise until the correct day appears. Ensure the date and day align accurately. Once set, push the crown back to its normal position to secure the adjustments for proper functionality.
Using the INDIGLO Night-Light Feature
The INDIGLO night-light illuminates the entire watch face for superior readability in low light. Activate by pressing and holding the INDIGLO button for 3 seconds, enabling NIGHT-MODE for up to 3 hours.
3.1 Activating and Deactivating NIGHT-MODE
Activate NIGHT-MODE by pressing and holding the INDIGLO button for 3 seconds; the watch will beep, indicating activation. The night-light will stay on for 3 seconds with any button press for 3 hours. Deactivate by pressing and holding the same button for 3 seconds again. NIGHT-MODE enhances visibility in low-light conditions without constant illumination, conserving battery life. Ensure no buttons are pressed underwater to maintain water-resistance.
3.2 Troubleshooting the INDIGLO Night-Light
If the INDIGLO night-light isn’t working, check the battery. Replace it with the type specified on the caseback. Ensure the watch isn’t damaged, as a cracked crystal can affect functionality. If NIGHT-MODE isn’t working, deactivate and reactivate it by pressing and holding the INDIGLO button for 3 seconds. If issues persist, contacting Timex Service for professional assistance is recommended. Proper care ensures optimal performance.
Water-Resistance and Care
Water-resistance varies by model, with 30M, 50M, or 100M ratings. Avoid button operation underwater to maintain resistance. Rinse with fresh water after exposure to salt or sand.
4.1 Understanding Water-Resistance Levels
Timex watches are designed with varying water-resistance levels: 30M (98ft), 50M (164ft), or 100M (328ft). These ratings indicate the depth at which the watch can withstand water pressure. Note that water-resistance is not permanent and may decrease over time. Activities like diving or high-impact water sports are not recommended, even for higher-rated models. Always avoid pressing buttons underwater to maintain water resistance and ensure optimal performance.
4.2 Caring for Your Water-Resistant Watch
To maintain your Timex watch’s water-resistance, rinse it with fresh water after saltwater or chemical exposure. Avoid extreme temperatures and external shocks. Regularly inspect the seals and crystal for damage. Do not open the watch yourself, as this may compromise its water-resistance. For optimal performance, have the gaskets and seals checked annually by a professional. Proper care ensures your watch remains reliable and withstands everyday conditions effectively.
Timex Extended Warranty
Extend your warranty to 5 years by purchasing within 30 days. Call 1-800-448-4639 or mail a check to Timex Extended Warranty, P.O. Box 1676, AR 72203, with your name, address, purchase date, and 5-digit model number for coverage.
5.1 How to Purchase Extended Warranty
To purchase the Timex Extended Warranty, call 1-800-448-4639 during business hours or mail a check to Timex Extended Warranty, P.O. Box 1676, Dept. EF, Little Rock, AR 72203. Include your name, address, telephone number, purchase date, and 5-digit watch model number. Payment must be made within 30 days of purchase. Accepted payment methods include AMEX, Discover, Visa, or MasterCard.
5.2 What is Covered Under the Warranty
The Timex Extended Warranty covers repairs to your watch under the same terms as the original manufacturer’s warranty. This includes defects in materials and workmanship. If your watch develops a defect within the warranty period, Timex will repair or replace it with a new or reconditioned model. The warranty does not cover damage caused by misuse, normal wear, or water damage due to improper handling. Regular maintenance, like battery replacements, is also not included.
For details, refer to your warranty booklet.
Battery Maintenance
Replace the battery with the type specified in your watch’s manual. Avoid extreme temperatures and moisture to prolong battery life. Store the watch in a dry place when not in use. Replace the battery promptly if you notice signs of depletion, such as dimming displays or erratic timekeeping. Proper care ensures optimal performance and extends battery lifespan.
6.1 Replacing the Battery
To replace the battery, first identify the type specified in your watch’s manual or caseback. Open the back carefully using a jeweler’s tool or consult a professional. Remove the old battery and insert the new one, ensuring correct polarity. If present, press the internal reset switch to reset the watch. Avoid touching battery terminals to prevent corrosion. Reassemble the watch and test functionality. Proper installation ensures accurate timekeeping and feature operation. Always use a replacement battery of the recommended type for optimal performance.
6.2 Signs of Battery Depletion
Signs of a depleted battery include a dimming or flickering display, erratic button responses, or the watch stopping entirely. The INDIGLO night-light may fail to illuminate, and features like alarms or timers might not activate. If the watch loses time accuracy or the second hand moves in fits and starts, it indicates low power. Addressing these signs promptly ensures uninterrupted functionality and prevents complete shutdown of your Timex watch.
Using the Countdown Timer
Access the timer by pressing MODE until “TIMER” appears. Use SET to adjust minutes, then START/SPLIT to begin. Press STOP/RESET to pause or reset the timer to its original time.
7.1 Setting the Countdown Timer
To set the countdown timer on your Timex watch, press the MODE button until “TIMER” appears on the display. Use the SET button to adjust the timer to your desired minutes. Once set, press the START/SPLIT button to begin the countdown. The timer will count down from the set time, and an alarm will sound when it reaches zero. Press STOP/RESET to pause or reset the timer to its original time.
7.2 Resetting the Countdown Timer
To reset the countdown timer, press the STOP/RESET button while the timer is running. This will stop the countdown and reset the timer to its original set time. If the timer has reached zero, pressing STOP/RESET will also reset it to the initial countdown value; Once reset, you can restart the timer by pressing the START/SPLIT button. This feature ensures you can reuse the timer without reconfiguring the settings.

Alarm and Chime Settings
Your Timex watch allows you to set alarms and manage the hourly chime. Press the START/SPLIT button to toggle the hourly chime on or off in Alarm mode.
8.1 Activating/Deactivating the Alarm
To activate or deactivate the alarm on your Timex watch, press the MODE button until the alarm time appears; Press SET to enter alarm-setting mode. Use the START/SPLIT button to enable or disable the alarm. The alarm symbol will appear when activated and disappear when deactivated. Ensure the alarm is set correctly for reliable reminders. Refer to your manual for additional details on customizing alarm settings.
8;2 Managing the Hourly Chime
The hourly chime on your Timex watch can be easily managed. Press the MODE button to access the alarm mode, then use the START/SPLIT button to toggle the chime on or off. The chime symbol will appear when active. This feature provides a convenient auditory reminder every hour. Adjusting the chime is straightforward and enhances your overall user experience with minimal effort required.
Chronograph (Stopwatch) Function
The chronograph function allows you to measure elapsed time by pressing the START/SPLIT button to begin, STOP/RESET to pause, and reset to zero.
9.1 Starting and Resetting the Chronograph
To start the chronograph, press the START/SPLIT button. The stopwatch will begin measuring elapsed time. To pause, press STOP/RESET. For an accurate reset, pull the crown to position A and press START/SPLIT until the hands reset to zero. This ensures precise timekeeping for your next measurement. The chronograph can run continuously for up to 4 hours before auto-resetting, making it ideal for tracking intervals or laps during activities.
9.2 Using Split Time Functionality
The split time feature allows you to measure intervals while the chronograph continues running. Press START/SPLIT during a lap to view the split time. The display shows both the lap time and total elapsed time. This feature is useful for tracking intervals in sports or training. To reset, press STOP/RESET. The watch automatically stores split times, enabling precise performance tracking and analysis during or after your activity.
Caring for Your Timex Watch
Regular cleaning with a soft cloth prevents dirt buildup. Avoid harsh chemicals. Store your watch in a cool, dry place to maintain water-resistance. Proper care extends its lifespan.
10.1 Cleaning the Watch
Use a soft, dry cloth to gently wipe the case, buttons, and strap, removing dirt and sweat. Avoid harsh chemicals or abrasive materials that may damage finishes. For metal straps, a slightly damp cloth can be used, but ensure it is thoroughly dried. Regular cleaning prevents grime buildup and maintains water-resistance. Avoid exposing the watch to direct sunlight during cleaning to prevent overheating or damage to internal components.
10.2 Storing the Watch
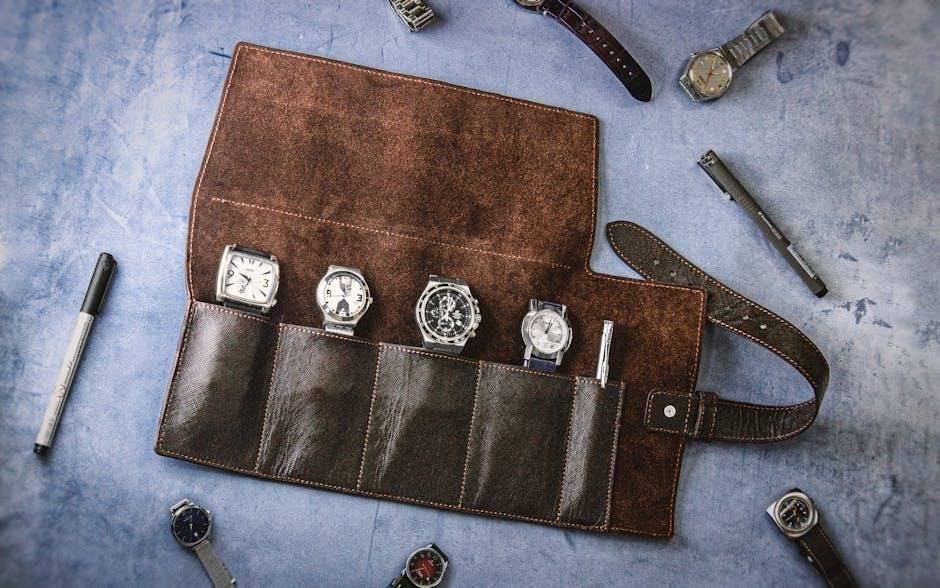
Store your Timex watch in a cool, dry place to prevent damage from extreme temperatures. Use a protective case or soft pouch to shield it from dust and scratches. Avoid exposure to strong magnetic fields. For leather straps, store separately from moisture. Clean the watch with a soft cloth before storing. If storing long-term, consider replacing the battery and ensuring it’s wound if automatic. Keep it away from heavy objects and magnetic sources. Store each watch individually to prevent scratching. Ensure it’s dry and protected from humidity. Regular maintenance and servicing are recommended before long-term storage.
Adjusting the Watch Band
Adjust the elastic strap by inserting one end into the buckle and pulling to fit. For metal bands, open the locking plate using a nail file or small screwdriver. This allows resizing to ensure a comfortable fit. Refer to your manual for specific model instructions.
11.1 Opening the Locking Plate
To open the locking plate on your Timex watch band, use a small screwdriver or blunt instrument. Gently pry the plate open, taking care not to scratch the metal. Once open, adjust the band length by sliding the buckle along the strap. After achieving the desired fit, secure the plate back in place to ensure the watch stays fastened. Handle with care to avoid damage to the mechanism.
11.2 Adjusting the Elastic Strap
Insert the elastic strap into the locking plate, ensuring it is securely fastened. Pull the strap gently to achieve your desired comfort level, making sure it fits snugly around your wrist. Avoid over-tightening, as this may cause discomfort. For added security, ensure the buckle is properly aligned with the strap holes. Regularly clean the elastic material to maintain its flexibility and appearance. Adjustments should be made carefully to prevent damage to the strap or locking mechanism.

Troubleshooting Common Issues
For time inaccuracy, sync with a reliable time source. If the INDIGLO night-light malfunctions, check battery life or reset by pressing the light button for 3 seconds.
12.1 Resolving Time Inaccuracy
If your Timex watch shows incorrect time, sync it with a reliable time source. For analog models, ensure the crown is fully pushed in. Digital watches may require resetting via the mode button. Check for battery depletion, as low power can affect accuracy. If issues persist, consult the user manual or contact Timex support for further assistance.
12.2 Fixing a Malfunctioning Night-Light
If the INDIGLO night-light isn’t working, try activating NIGHT-MODE by holding the INDIGLO button for 3 seconds. If it still doesn’t function, deactivate and reactivate NIGHT-MODE. Check the battery level, as a depleted battery can affect the light. Inspect for damage to the watch crystal, which may require replacement. If issues persist, contact Timex Service for professional assistance.